Press-on nails offer the convenience of a salon-perfect mani at home, but pesky air bubbles trapped underneath can ruin that flawless look. This guide provides effective yet simple tips to help avoid those unsightly bumps and air pockets when applying your press-on nails. By properly prepping your natural nails, choosing the right sizing and high-quality adhesives, and using the correct pressing techniques during application, you can achieve a smooth, bubble-free finish every time-no more embarrassing air pockets ruining your fresh new manicure.

Why Do Air Bubbles Form Under Press-On Nails?
Air bubbles that get trapped under press-on nails appear as small raised bumps or pockets disrupting the smooth, even surface you want from the fake nails.
These pesky air pockets are commonly caused by:
- Trapped Air During Application: One main cause is air literally getting trapped between the press-on nail and your natural nail as you’re applying the adhesive.
- Improper Pressing Technique: Not pressing firmly and evenly when adhering the nail can allow air to become trapped in spaces instead of getting pushed out.
- Poor Nail Preparation: If you don’t properly prepare your natural nails by cleaning, buffing, and degreasing the surface beforehand, air pockets are more likely to form.
- With this knowledge, you can better follow the preventative tips for a smooth, bubble-free application.
Getting Your Nails Ready for Press-Ons
To avoid trapping air bubbles under your press-on nails during application, proper preparation of your natural nails is key.
Gather Your Supplies
Make sure you have the following tools and materials ready:
- Press-on nail kit
- Nail adhesive or glue
- Cuticle pusher
- Nail file and buffer
- Alcohol wipes or nail cleanser
Clean and Prep Those Nails
Remove Any Polish or Residue
Start with a fresh base by taking off any existing nail polish or adhesive residue from previous manicures. Use a non-acetone remover.

Wash and Dry Hands Thoroughly
Washing your hands with soap and water helps remove excess oils and debris from nails and nail beds. Dry your nails completely before moving on.
Push Back Cuticles
Gently use a cuticle pusher to push back cuticles, creating a clean surface area for the press-ons to adhere to.
Lightly Buff the Nail Surface
Using a buffer, lightly rough up the surface of each nail. This allows the adhesive to grip better.
Degrease With Alcohol Wipes
Finally, wipe down each nail with an alcohol wipe or cleanser. This removes any last traces of oil that could interfere with adhesion.
Proper prep makes all the difference! With your nails properly cleaned, buffed, degreased and prepped, you’ve eliminated areas where air could potentially get trapped when applying press-ons.
Choosing the Right Press-Ons and Adhesive
Getting the proper fit for your press-on nails and using the right nail adhesive are crucial steps in avoiding air bubbles during application.
Press-On Nail Fit
Take the time to find press-on nail sizes that closely match the shape and size of your natural nails. Nails that are too large or small increase the chances of trapping air pockets underneath. If the press-ons you have are just slightly too wide or long, you can carefully file the edges to better customize the fit to your nail beds.
Press-On Nail Adhesive
Don’t rely on cheap, low-quality glue or adhesive tabs that are more prone to allowing air bubbles. Instead, invest in a high-quality thick nail glue specifically formulated for artificial nails. A strong, reliable nail adhesive has the proper consistency to evenly adhere the press-on without trapping air. It also helps prevent premature lifting that can lead to air pockets forming over time.
Proper Application Techniques for Bubble-Free Press-On Nails
Applying Adhesive Correctly
Using the right amount of adhesive is crucial. Apply a thin, even layer to the underside of the press-on nail. Spread it from edge to edge, but avoid any goopy, thick areas which can trap air pockets. On the flip side, don’t use too little adhesive or your nails may not adhere properly.
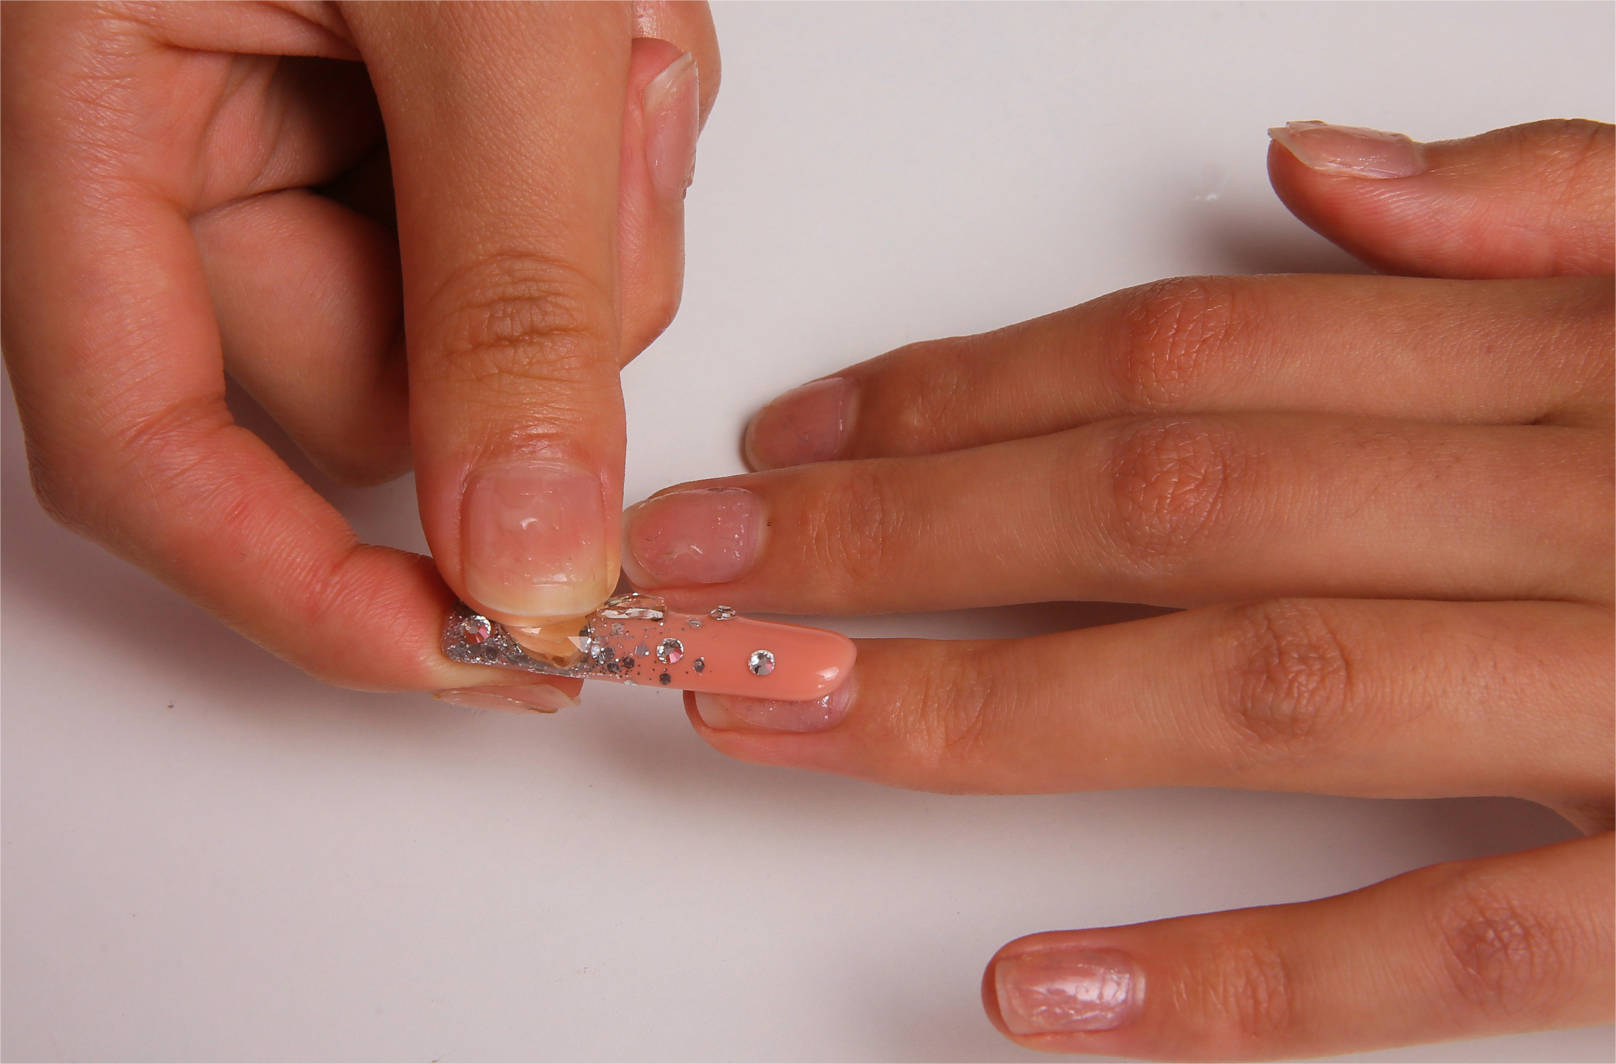
Positioning the Press-On
Start by lining up the press-on along the edge of your cuticle. Then lower it down at a slight angle towards the tip of your natural nail. This angled approach allows any air to get pushed out towards the free edge as you press instead of becoming trapped.
Pressing Technique
With the press-on angled, apply firm, even pressure across the entire nail as you adhere it. Press from the cuticle area towards the tip in one smooth motion - don’t rock back and forth. Once fully adhered, hold the nail down with pressure for 30 seconds minimum. This ensures a tight seal with no air bubbles sneaking in.
Smoothing Edges
After pressing and holding, run a cuticle stick gently along the edges of the press-on nail. This smooths out any areas where a tiny air pocket may have been trapped during application. Take your time and don’t rush this edge-smoothing step.
The Right Technique Matters
Following these best practices for applying adhesive, positioning the nails, using a firm pressing motion, and smoothing the edges practically eliminates any air bubbles from ruining your fresh new manicure. Mastering this technique makes all the difference.
What to Do After Applying Press-On Nails
Even with proper application techniques, it’s still a good idea to inspect each nail right after adhering the press-ons and make any needed adjustments before the adhesive fully sets.
Inspect for Air Bubbles Immediately
Once all the nails are adhered, go back and carefully examine each one up close. Look closely at the nail surface and edges for any small trapped air bubbles you may have missed.
Make Adjustments As Needed
If you spot any air pockets, you have a brief window to fix them before the adhesive cures and they become permanent. Gently lift the edge of the press-on nail and reapply it following the angled positioning and pressing technique to push any trapped air out.
For small bubbles, try using a cuticle stick to gently massage and flatten them out against the nail without fully removing the press-on.
Final Finishing Touches
After adjustments, use a fine grit nail file to lightly buff over any imperfect edges on the press-on nails for a seamless finish.
You can also apply a layer of high-quality top coat over the adhered nails. This adds a smooth, professional-looking shine while helping to secure and seal the press-ons to prevent future lifting or trapped air.
Extra Tips for Flawless Bubble-Free Nails
In addition to the key techniques covered, here are some extra tips and best practices to set you up for perfect press-on nail application every time:
1. Find a Clean, Well-Lit Space
Apply your press-on nails in a clean, clutter-free area with good lighting. This allows you to properly inspect for any trapped air bubbles and make adjustments as needed.
2. Avoid Dusty or Humid Conditions
Excessive dust, dirt or moisture in the air can negatively impact the nail adhesive’s effectiveness and increase chances of air bubbles forming.
3. Don’t Rush the Process
One of the biggest mistakes is trying to adhere press-on nails too quickly. This rush leads to sloppy applications and higher likelihood of trapping air pockets.
4. Go Slowly and Deliberately
Follow each step of cleaning, prep work, adhesive application, positioning, and pressing patiently and deliberately for the best results.
5. Use Press-On Skills Regularly
The more frequently you apply and remove press-on nails, the better you’ll become at the process. Your skills at avoiding air bubbles will continuously improve.
6. Consider It An Art Form
Approach press-on nails as an art that takes time to fully master. Stick with it, have patience, and your manicures will look professionally done every time.
Enjoy Seamless, Bubble-Free Press-On Nails!
With the right prep, quality materials, and meticulous techniques, you can sport flawless, bubble-free press-on nails. Thoroughly clean and buff natural nails, select well-fitted press-ons and strong adhesive, apply using the angled positioning and firm pressing, then inspect for any trapped air pockets. Take your time, work in an optimal space, and practice regularly to hone your skills. Stay patient and dedicated - these tips allow you to rock professional-quality manicures at home without a single unsightly air bubble.Once you've mastered the art of bubble-free application, you can explore endless possibilities for stylish manicures, particularly with the exciting nail trends emerging this summer.