Those little press-on nails you can grab at the drugstore aren’t just for slapping on a quick, plain mani anymore. These days, jazzing them up with all kinds of custom decorations and designs is a huge DIY beauty trend. This guide will show you easy, fun ways to transform basic fake nails into truly unique works of nail art.
From simply painting them your favorite shades to going all out with intricate designs, sparkly gems, 3D decorations and more - you’ll learn tons of creative techniques for crafting nails tailored to your style and any occasion. We’ll cover all the basics to get you started, like picking the right press-on sizes, prepping the nails for decorating, and planning out your designs. You’ll also get tips for keeping your custom mani looking fresh, properly applying and removing the nails, and troubleshooting if anything gets messed up.

Preparing Your Press-On Nails for Customization
Finding the Right Fit
First up, you’ll want to get press-on nails that actually fit your real nails. Most brands offer sizes ranging from subtly short to dramatic stilettos. Grab a kit with multiple size options so you can mix and match to find the perfect fit for size nail. You’ll also want to pick a shape you vibe with - go classic with round or squoval, or try trendier coffin, almond or stiletto shapes.
Prepping for Decoration
Before you start getting creative, give those press-ons a good cleaning. This helps remove any oil or grime so your designs stick properly. An alcohol wipe works great to degrease the surface. You can also use a special nail dehydrator or bonder product to really ensure everything adheres.Knowing Solving common nail polish problems can help you achieve a perfect finish and prolong the life of your designs.
Rounding Up Your Crafting Supplies
Having all your tools and materials ready to go will make decorating way smoother. Here’s what you’ll want on hand:
- Nail polishes (regular lacquer, gel polish, or acrylic craft paints all work)
- Precise brushes for detail work
- Dotting tools, stripers or toothpicks for making patterns
- Nail bling like gems, studs, foils, etc.
- Top coat to seal in your designs
- Nail files and buffers
- Cotton balls and polish remover for cleaning up mistakes
Once your nails are prepped and you’ve gathered all your crafting goods, you’re totally set to start creating your custom mani masterpiece!

How to Get Design Inspiration for Your Press-On Mani
Trendy Seasonal and Holiday Looks
One super easy way for you to come up with design ideas is by looking at what’s hot for the current season or upcoming holidays. Spring and summer have you feeling those bright, floral patterns while fall is all about rich tones with leaf or pumpkin motifs. And winter is the prime time for you to try snowy, holiday-inspired designs like snowflakes, Christmas trees, ornaments and more.
What Color Palette Should You Choose?
Having a cohesive color scheme helps pull your whole mani design together nicely. You can go classic with a simple French tip or a single color. Try an ombre fade using multiple shades in the same color family. For more contrast, pair a bold base color with accent nails in complementary tones. Or get wild with neon brights or unexpected color combos!
How Can You Visualize Your Design First?
If you’re the creative doodler type, keep a little sketchbook handy to pencil out nail designs and color ideas before decorating the press-ons. Don’t have art skills? No problem! There are tons of nail art apps and tutorials that let you virtually “try on” looks by uploading a pic of your nails.
With a clear vision in mind whether inspired by trends or your own imagination you’ll be ready to move on to customizing. Having a plan keeps you focused and prevents costly mistakes.

Beginner-Friendly Decorating Ideas for Press-On Nails
Painting Is a Piece of Cake
One of the easiest ways to jazz up those press-ons is simply painting them with regular ol’ nail polish or specialty lacquers made for fake nails. Regular polishes work totally fine, but gel polishes or little bottles of acrylic craft paint tend to provide better coverage and last longer.
For a basic DIY mani, start by putting down a base coat on the press-ons, then paint 1-2 thin coats of your color, letting it fully dry between coats. You can even paint each nail a different but complementary shade for an ombre look. Use a dotting tool or a toothpick to create simple polka dots or striped patterns.
Adding Some Sparkle and Bling
Take those painted press-ons to the next level by sprinkling on some sparkle and bling! Glittery nail polishes or loose cosmetic glitters can be applied over the base color while it’s still wet to add major shine. Nail decals, stickers, or those adhesive foil wraps create fun accents. And small rhinestones, metallic studs, charms, or beads add a pop of 3D glam.

For gems and charms, use a toothpick or dotting tool dipped in nail glue to precisely pick them up and place them on the nails. A quick top coat helps smooth out any textures and locks in all that bling.
Next-Level Nail Art for Your Press-Ons
Hand-Painted Designs
Take your press-on nail art to the next level with intricate hand-painted designs. This allows you to create literally any look you can imagine with a steady hand and the right tools.
Start by applying a base color and allowing it to fully dry. Then use a thin detailer brush to carefully draw designs freehand. Fine liner brushes work best for crisp lines and details. For larger areas, use a standard brush.
Floral designs, geometric patterns, letters/words, and cartoon characters all make great hand-painted options. You can even try replicating traditional styles like French tips or color-blocking with a steady brush.
3D Nail Art
Achieve a striking 3D effect by building up designs with sculptural elements and textured materials beyond just flat polish.
The simplest 3D element is adhering rhinestones, beads, charms or other embellishments using nail glue. Apply these atop the base color once it dries.
For more complex 3D art, try using acrylic powder and liquid monomer to sculpt raised designs directly onto the press-on nails. Or use potted UV/LED gels and cure with a lamp between layers to create textured patterns.
Themed Nail Designs
Get creative with holiday or occasion-specific themed designs for a festive, celebratory look! Repurpose craft supplies for fun embellishments.
For example, add adhered tin foil shapes or drawn icing details for Christmas sweater nails. Metallic studs and gems create firework bursts for New Year’s. Use dried flowers for a nature-inspired spring look.

Wedding nails can feature hand-painted lace, bows, or gem clusters. For birthdays, add age numerals or even candles sticking off the nails.
Sealing and Finishing Your Customized Press-On Nails
Don’t Skip the Top Coat
Once you’ve gone through all the work of customizing your press-on nails with polish, gems, 3D details and more, you’ll definitely want to lock all that in with a durable top coat. This creates a smooth, protective finish to prevent premature chipping or losing those hard-earned decorations.
Most regular clear nail polish top coats will work just fine for basic painted designs. But if you went all out with major textures and embellishments, use a thicker, gel-based top coat instead - it’ll basically encase and seal your whole design.
When applying, make sure to cap the free edge of each nail and wrap the top coat just over the tip to prevent frustrating chips there later on.
Matte or Glossy? You Decide
The finish you choose for your top coat also impacts the overall vibe of your custom mani. A glossy top coat creates a glassy, high-shine look to make colors and bling really pop. This classic choice works for most nail art looks.
But if you want more of a modern, edgier vibe, go for a matte top coat. This leaves your nails with a flat, velvety finish that can actually make matte glitters and other textures stand out more. You can even mix things up with glossy embellishments over a matte base.
Locking It All In
Most regular nail polishes and top coats just need some air time (usually 10-30 minutes) to naturally dry and harden into a durable finish. You can use a quick-dry spray to speed things up.
If you used any gel polishes or UV gel products during decorating, you’ll need to cure those under a LED or UV lamp for about 60 seconds per nail as the final step after the top coat. Properly curing those gel formulas is key for long-lasting wear.

How to Apply Your Customized Press-Ons
Final Fitting Before Application
Before applying your freshly customized and sealed press-on nails, do one final fit check. Make sure each nail matches its corresponding natural nail size and that the overall shape and curve follow your nail beds properly.
Lightly buff or file down any areas of the press-ons as needed for a seamless fit. You want them flush against your nails with no gaps or extra spaces.
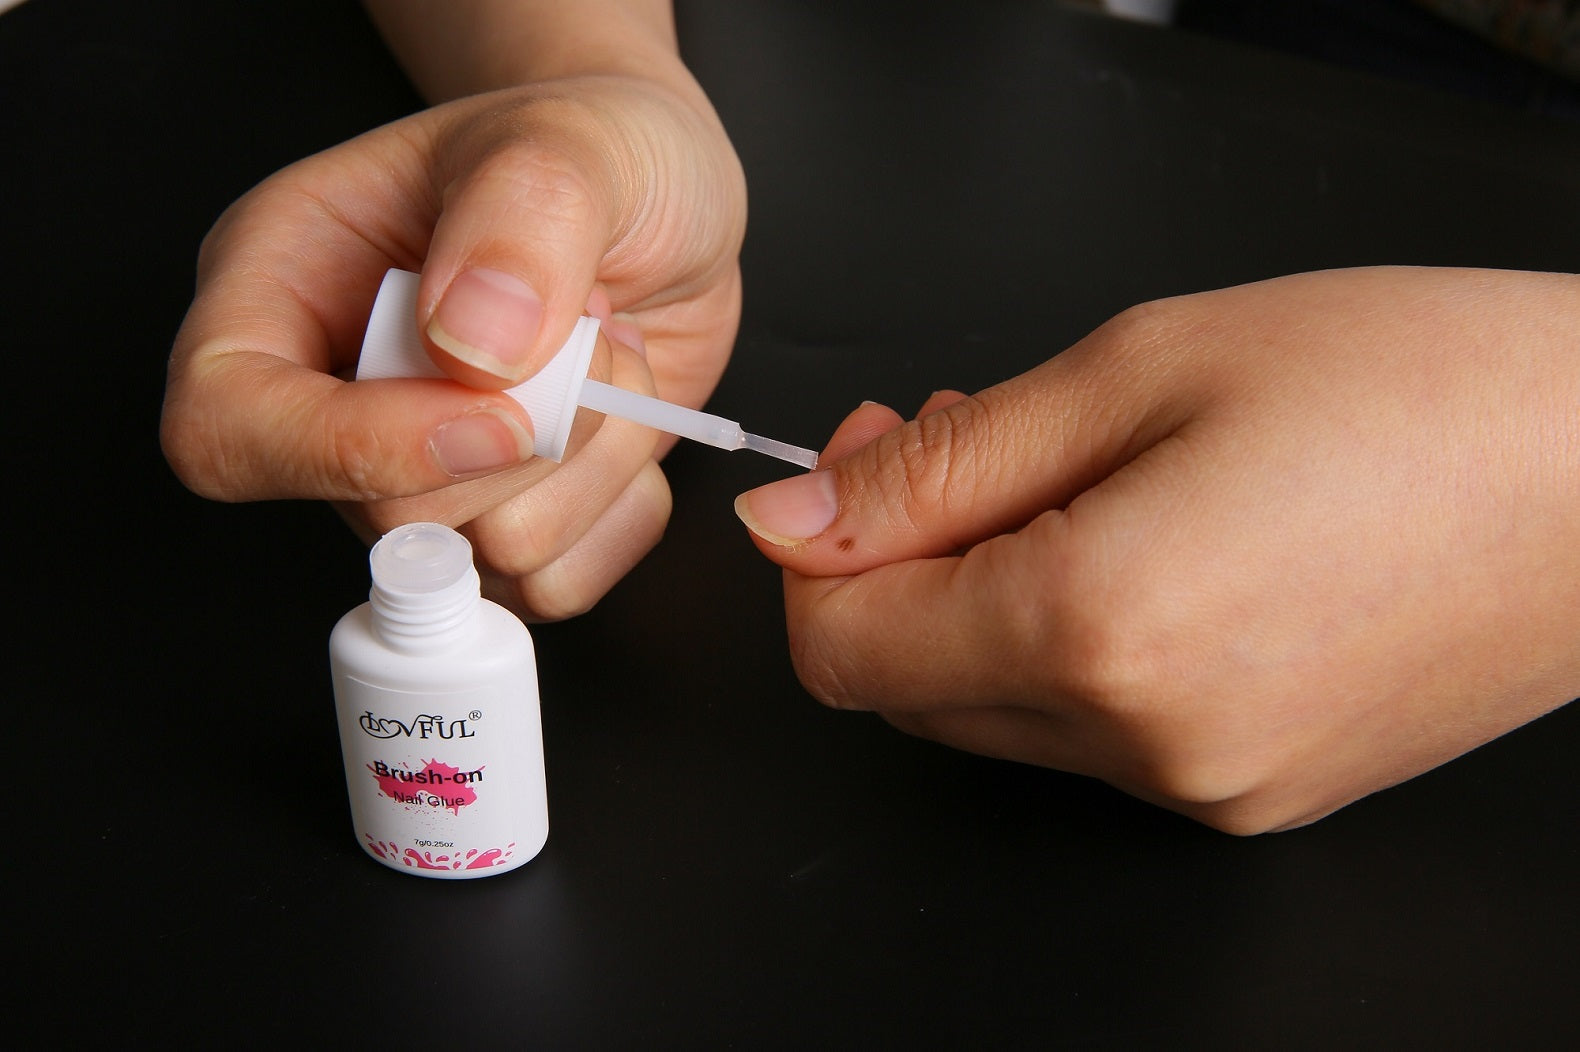
Choosing the Right Adhesive
How you apply your decorated press-ons comes down to personal preference for adhesives - nail glue or adhesive tabs.
Nail glue provides the strongest, most durable hold, which is ideal for keeping embellishments secure long-term. Just be careful during application to avoid smudging any 3D designs.
Adhesive tabs offer a bit more flexibility and are less likely to disturb decorations during application. However, they may not provide quite as lasting of a grip as glue over time.
Either way, refer to the adhesive directions and apply thinly and evenly along the entire nail bed.
Maximizing Wear Time
To ensure your custom nail designs last as long as possible once applied, start by capping the free edges with a swipe of the top coat. This helps prevent premature chipping and lifting.
Throughout wear, be gentle with your hands and avoid excessive water exposure which can loosen adhesives and degrade designs faster. At night, consider applying cuticle oil just to the nail bases.

Get Creative with Custom Press-On Nail Art
Press-ons have become a canvas for self-expression through nail art designs. Using the techniques here, from simple polishes to intricate hand-painted looks and 3D embellishments, you can craft totally custom nail styles showcasing your unique artistic flair. Feel free to follow trends or let your imagination lead - the possibilities are endless when decorating these blank artificial nails. With proper prep, application and finishing, your custom mani will stay vibrant and intact whether using nail glue or adhesive tabs. So, grab some press-ons and craft supplies, and start exploring DIY nail art made just for you.
