Ombre nails have taken the beauty world by storm, captivating nail enthusiasts with their mesmerizing gradient effects. This trendy style seamlessly blends two or more colors together, creating a beautiful and eye-catching look that suits any occasion. Whether you prefer a subtle and classic gradient, or a glamorous and sparkly glitter fade, mastering the art of ombre nails is easier than you might think. In this comprehensive guide, we’ll walk you through the essential steps and techniques needed to create stunning ombre nail designs at home, empowering you to express your personal style and creativity through your nails.
Nail Preparation: The Foundation for Ombre Art
Before diving into the exciting world of ombre nail designs, it’s crucial to lay the groundwork for a flawless application. Proper nail preparation ensures that your ombre masterpiece will look its best and last longer.

1. Cleaning and Prepping
Start by thoroughly washing your hands and nails with mild soap and water to remove any dirt, oil, or residue. To avoid pesky nail polish stains later, make sure your nails are completely free of any old polish or base coat. Once dry, use a soft nail buffer to gently buff the surface of your nails, creating a smooth canvas for your ombre design. This step helps the polish adhere better and results in a more even application.
2. Nail Shaping
Choose a nail shape that complements your desired ombre look. Round, oval, and square shapes are popular choices, but feel free to experiment with what suits your personal style best. Use a nail file to carefully shape your nails, ensuring they are all uniform in length and shape.
3. Cuticle Care
Healthy cuticles are essential for maintaining the overall appearance of your nails. Gently push back your cuticles using a cuticle pusher, being careful not to damage the delicate skin. If necessary, use a cuticle remover product to soften and remove any excess cuticle tissue safely.
4. Applying Base Coat
To protect your natural nails and create a strong base for your ombre design, apply a clear base coat. This step helps prevent nail discoloration and ensures that your polish adheres properly to your nails. Allow the base coat to dry completely before moving on to the color application.
Choosing Colors and Materials
Picking the right colors and having the correct tools and polishes are important steps in creating a pretty ombre nail design.
When choosing your colors, look for shades that blend nicely together to make a smooth and even gradient effect. Colors that complement each other often work well, like using light and dark shades of the same color (such as light pink and dark pink) or colors that are next to each other on the color wheel (like blue and green). The colors you choose can also help create a specific mood or feeling. For example, soft pastel colors can give a romantic or gentle look, while bright, bold colors can create a fun and lively effect.
To make your ombre nail art, you will need nail polish in the colors you’ve chosen, a clear base coat, and a top coat. Depending on the specific ombre technique you want to try, you might also need a makeup sponge (for the sponge ombre method) or glitter polish (for the glitter ombre style). Other helpful tools include nail art brushes or toothpicks for small details and cleaning up edges, as well as nail polish remover and cotton swabs for fixing mistakes or tidying up your work.
When buying nail polish, it’s a good idea to choose quality brands that have a nice, smooth consistency and good color coverage. This will make it easier to create an even gradient effect and help you get the color intensity you want for your ombre look.
Technique 1: Classic Gradient Ombre
The classic gradient ombre is a timeless and pretty nail art style that blends colors together smoothly using a brush. Here’s how to do it:
1. Layering Basics
First, paint your nails with the lightest color you’ve picked. Put on a thin, even coat and let it dry all the way. Then, use your second color to paint a thin line along the tip of your nail, slightly overlapping the first color. If you’re using more than two colors, repeat this step.
2. Blending Techniques
To make the colors blend smoothly, use a small nail art brush or a clean, thin brush dipped in nail polish remover. Gently blend the colors where they meet, starting at the center of the nail and working towards the edges with light, feathery strokes. Keep blending until the colors flow into each other nicely.
3. Setting the Design
Once you like how your gradient looks, let your nails dry for a few minutes. To help your design dry faster and last longer, you can use a fast-drying top coat or a nail drying spray. Put a thin layer over your ombre nails and let them dry completely.
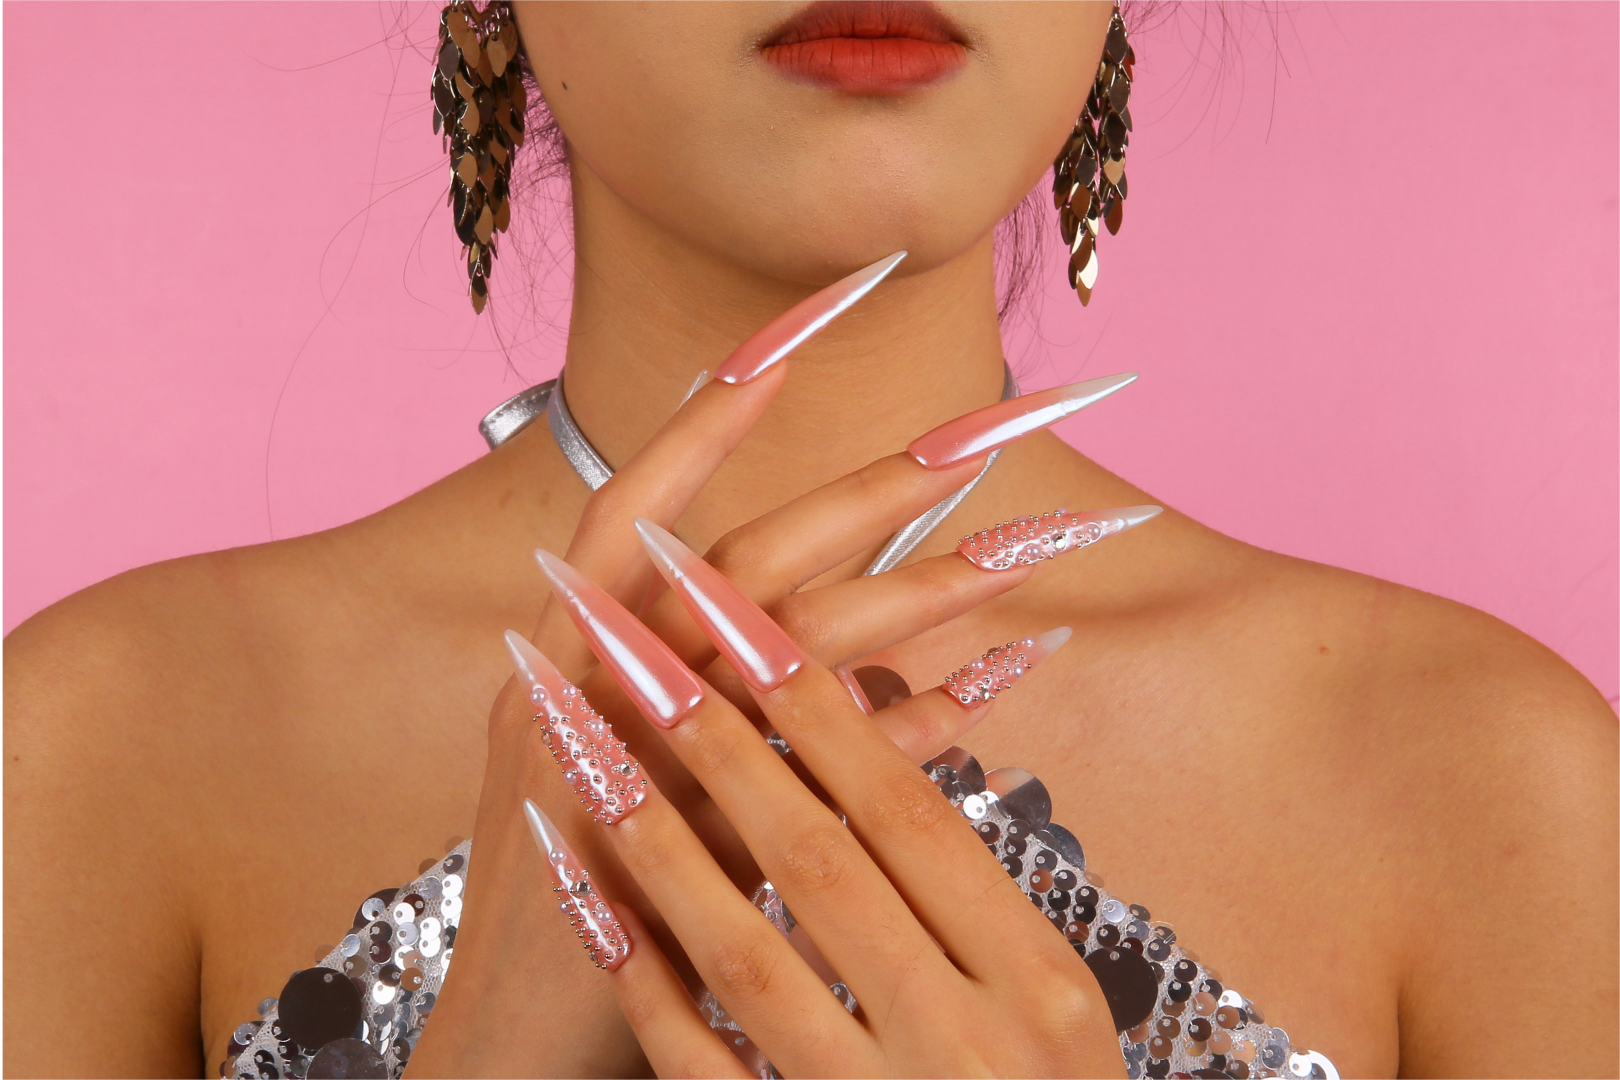
4. Lovful Press-On Nails: “Blushing Bride”
If you love the classic gradient ombre look but don’t have the time or skills to do it yourself, try Lovful’s “Blushing Bride” press-on nails. These nails have a romantic, pink chrome color that looks like a blushing bride’s glow. Soft white and pink hues add pretty accents. With Lovful’s press-on nails, you can get a perfect classic gradient ombre look quickly for weddings, special events, or any time you want to add some elegance to your style.Read more: about Fashion Nail Designs 2024.

The classic gradient ombre is a great way to create a soft, blended look that’s perfect for any occasion. Whether you make it yourself or use Lovful’s “Blushing Bride” press-on nails, you’ll have stunning, gradient-inspired nails that everyone will admire.
Technique 2: Glitter Ombre Method
The glitter ombre method is a great way to add some sparkle and glamour to your gradient nail art. By slowly building up the amount of glitter polish, you can create a stunning, eye-catching ombre effect that’s perfect for special occasions or whenever you want to add some elegance to your look.
1. Glitter Polish Application
Start by putting a light-colored base coat on your nails, like a soft pink or nude shade. This will help the glitter stand out and give you a smooth base for your ombre design. Once the base coat is dry, put a thin layer of glitter polish on the tips of your nails, covering about a third of the nail.
2. Fading the Glitter
To create a smooth glitter gradient, use a small makeup sponge to gently dab and blend the glitter polish upwards towards the center of your nail. This will help spread out the glitter and create a fading effect. Keep doing this, gradually building up the glitter at the tips and fading it towards the center until you get the look you want.
3. Sealing the Glitter
To make sure your glitter ombre lasts and to keep any glitter bits from falling off, it’s important to seal your design with a clear top coat. Put a generous layer of top coat over your nails, making sure to cover all the glitter. Let your nails dry completely before touching or using your hands to avoid smudging.
4. Lovful Press-On Nails: “Sleeping Beauty”
If you love the idea of a glitter ombre but want a bolder, brighter look, try Lovful’s “Sleeping Beauty” press on nail set. This stunning collection has a vibrant orange color that’s sure to get noticed, along with shiny rhinestones for an extra touch of glamour. With Lovful’s press-on nails, you can get a perfect glitter ombre look in minutes, without needing any special tools or techniques. Just put on the nails and enjoy your instantly fabulous, eye-catching manicure.

The glitter ombre method is a great way to take your nail art to the next level and create a dazzling, head-turning look. Whether you make the look yourself or choose the convenience and bold style of Lovful’s “Sleeping Beauty” press-on nails, you’re sure to make a statement wherever you go.
Your Ombre Nails: A Stylish Way to Show Your Creativity
Creating beautiful ombre nails at home is not as hard as it seems. By following our guide, you can learn how to blend colors for a classic gradient, a bold sponge effect, or a sparkly glitter fade. Start by getting your nails ready, picking colors that look good together, and using the right tools for the look you want. If you don’t have much time or want a guaranteed way to get great results, try Lovful’s “Blushing Bride” or “Sleeping Beauty” press-on nails for an instant ombre style that will get noticed. With some practice and creativity, you can make your nails look amazing and show off your unique style. So go for it, and let your ombre nails shine bright!